Home Popular Popular Questions Article
How do I open a specific port on my Windows Server?
Created on 2022-03-24 Updated on 2024-01-06Opening ports on your Windows Server to make your hosted program/website available and open to the public, In this article we'll cover how to Enable any port we want and make it available to the public.
Note: If your hosting provider has a firewall panel, Use that according to your cloud provider's instructions to open the port otherwise follow up here!
All of the Overlaxed Cloud Computing services are configured with ports enabled and open by default, except for a select few that are specifically closed to safeguard against potential instances of fraudulent activities, spamming, and security breaches.
Steps
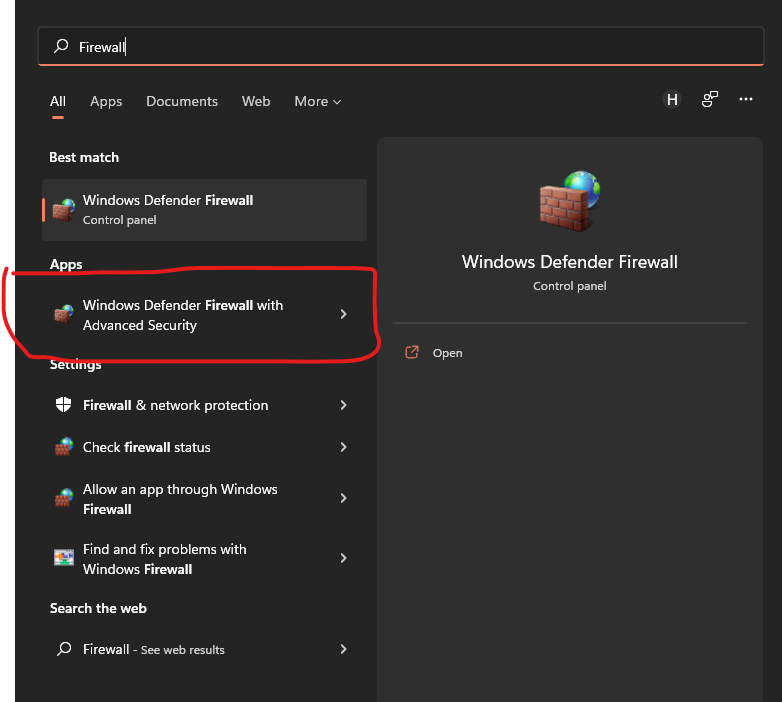
1. Go to Windows Search
2. Type "Windows Defender Firewall with Advanced Security"
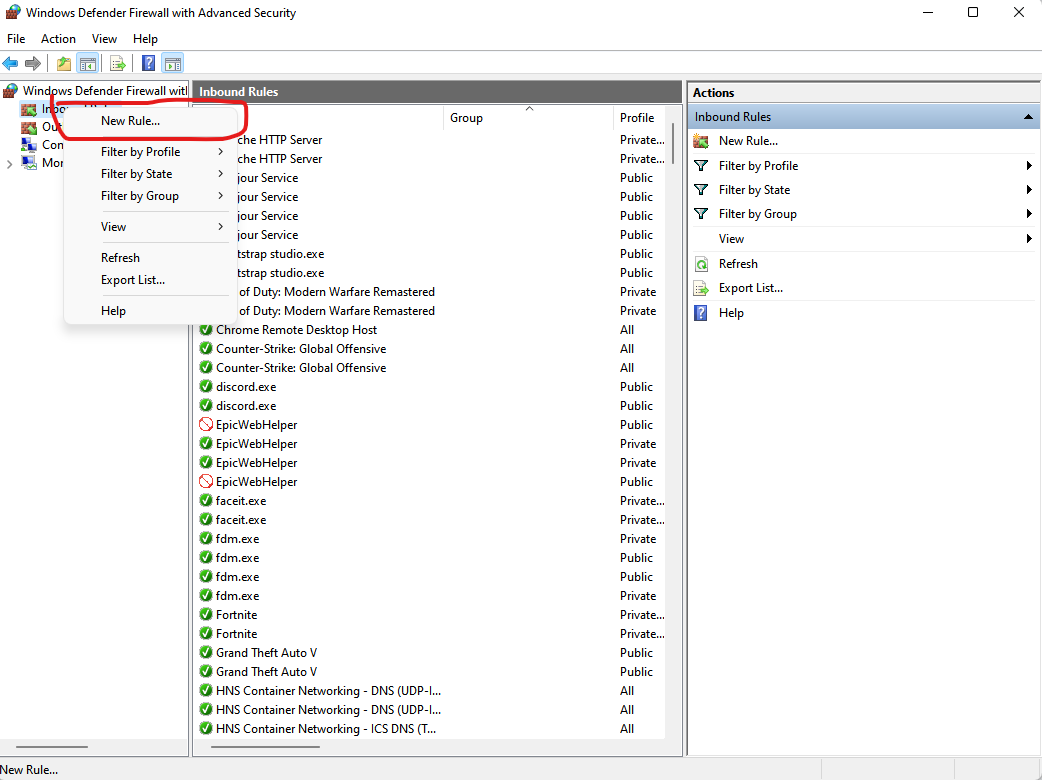
3. Right click on Inbound Rules and Hit "New Rule"
4. A New window will popup
5. Select Rule type as "Port" and hit Next
6. Enter your Port in the port menu, and make sure it's TCP/UDP Depending on your hosting service's nature
7. Done
Congratulations, We have now enabled the port on the Windows Firewall Rules
Explanation
If you try to check the port for your window's IP after this and get Port Closed. the reason will be either you chose the wrong Type(TCP/UDP) OR Your program/website is not running properly so do check for logs/errors or in case the port itself is being USED.
Conclusion
Windows Firewall Program overrides any Provider's Firewall Security unless the Provider modifies the Operating System template and adjusts it.
It's always good to have The Firewall on and only Enable certain ports to avoid security threats.
Found this article helpful?
[ 2 Out of 4 Found Helpful ]
